DRY120 POOL system
The sheets of the DRY120 POOL system must be glued with a thin layer of C2 S1 / S2 tile adhesive.
Waterproofing of specially designed sheets to ensure complete sealing of swimming pools, whether new construction or renovation. She
Provides waterproofing solutions for all types of swimming pools, tanks and water storage in general. Glue-based installation that eliminates
The need for special tools or products. It is very useful so that in most cases there is no need to disassemble the existing flooring. No complex preparation is required
Of the base surface, and only tools and products commonly used on work sites are required.
The sheet consists of a double sheet of reinforced EVAC coated with fiber on both sides.
Both sides offer optimal grip thanks to the C2 S1-S2 adhesive used in the installation as a glued sheet.
Connections must be aligned so that they are tight and sealed using our DRY50 BANDA and our SEAL PLUS connector gasket.
The only sealing sheet installed on existing glass mosaic tiles with tile adhesive
The special geotextile fibers of the sealing sheet filter water that evaporates as the tile glue dries and diminishes, preventing air bubbles from forming and ensuring a 100% durable connection compared to other sealing systems.
System Benefits
 |
No demolitions When completing repairs, the sheet is installed directly on existing tiles Glass mosaic etc. This feature offers several benefits: it reduces the Installation time, saving labor costs, no need to rebuild the pool and it is Cleaner. |
 |
Installation with tile adhesive Installation is very simple and no previous experience is required. The sealing sheet is glued Directly on the surface with tile adhesive. C2 TE S1-S2 Special adhesives are only needed Some surfaces like metal, PVC, wood etc. have no waiting time. Our system saves time. When installed, you can expect the sheets Immediately. |
 |
Prevents cracks The special design of the sheet spreads vibrations from the water pressure in the pool, and it prevents Cracks and fractures or disconnection of the coating material which is usually mosaic tiles From glass |
 |
Minimum thickness The strainer is only 1.2 mm thick, which creates a very minimal increase in pelvic size The pool – no more than 2 cm including coating material |
 |
Elastic and flexible sheet PVC profile for attaching the tiles to the shower floor. They prevent traffic from The parts help lift the lift. 2 profiles in floor tile dimensions The biggest ones are included.Resolving critical points Thanks to SEAL PLUS and BIPLUS adhesives, we guarantee complete sealing in the union between Sheet and most critical points, especially where additional sealing is required Against water as in jets and lighting |
 |
Prevents negative pressure filtering The rear geotextile fibers drain the moisture that can pass into the pool basin Because of negative pressure (inside out) |
 |
You can use partial repairs The system can be used to repair certain or critical areas of the pool. Weatherproof sieve sheetsUnlike waterproofing liquids, the DRY120 POOL system is unaffected Rain during installation work, ensuring perfect performance without the cost of time Or more work |
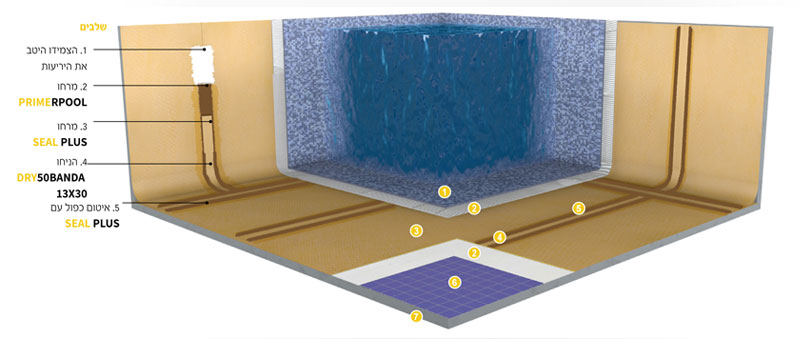
Construction details dry120 pool
Building

- Coating
- C2TE S1-S2 level tile adhesive
- Sheet DRY120 POOL
- DRY50 BANDA 30X30
- Adhesive SEAL PLUS
- Platform
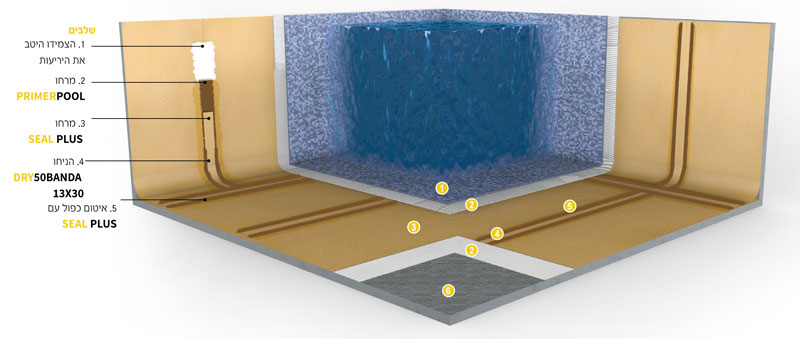
Renovation

- Coating
- Glue tile level C2TE S1-S2
- Sheet of DRY120POOL
- DRY50BANDA 13X30
- SEAL PLUS Adhesive
- Old coating
- Platform
Installation
Before installing the sheet, the substrate surface on which it will be glued must be taken into account, and new and refurbished pools must be distinguished.
In the case of a completely new pool, the surface should be cleaned thoroughly before pasting the sheet.
In renovation work, make sure that the existing coating material is firm and firmly glued to the substrate. Clog cracks if any. When you’re done, clean up thoroughly
The entire surface before the paste is started.
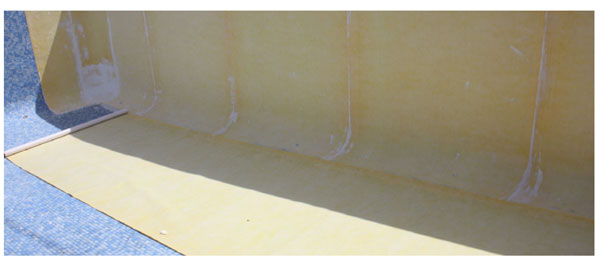
1. Place the DRY120 POOL sheets directly on the old coating material, cement base or concrete
Using C2TE S1-S2 adhesive, the sheet should only be glued to stabilized adhesive. desirable
Start from the walls and move to the floor.
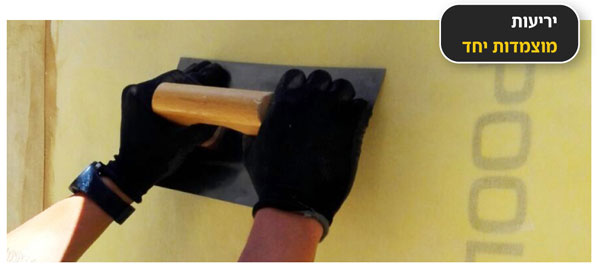
2. Fasten the sheet firmly against the substrate with a plastic spoon. Make sure the sheet
The whole is adjacent to the substrate and there are no air bubbles, however small to prevent bumps in the future.
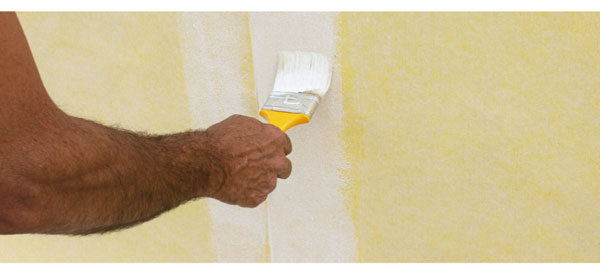
3. PRIMERPOOL should be applied to the entire surface where it is applied, SEAL PLUS across
About 20 cm.
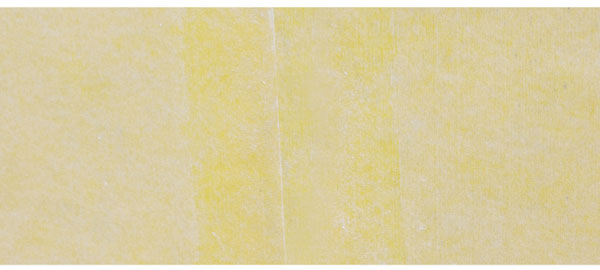
4. Wait 15 to 20 minutes for the PRIMERPOOL layer to turn from brick to transparent
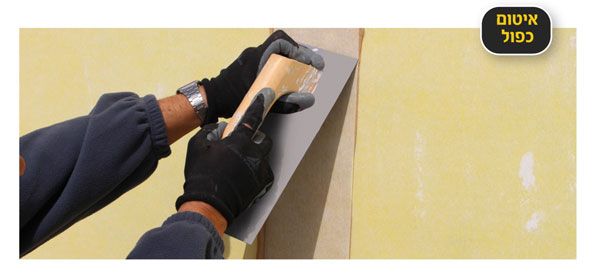
5. The sheets are firmly pinned together, but they do not overlap. They are sealed with DRY50BANDA 13
And affixed with adhesive for SEAL PLUS connections. Because of the thickness of the paste, use a flat spoon or
Spechtel to create a uniform covering that covers the entire area.
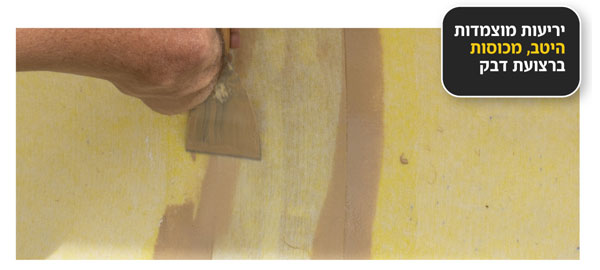
6. Then double seal with SEAL PLUS glue along the edge of the strip.
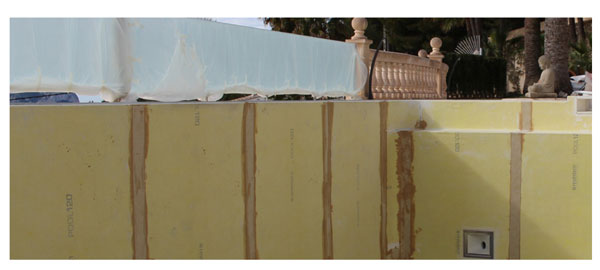
7. Once all connections and special areas * are sealed, make sure the sheets are glued
Completely to the substrate.
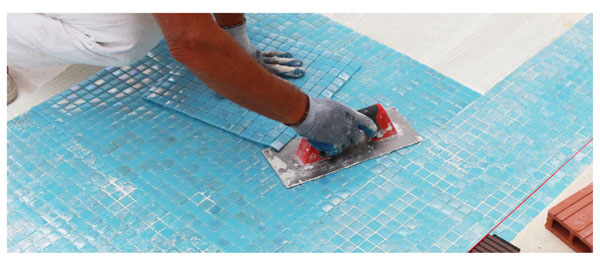
8. After checking that the sheets are firmly in place, the new coating material can be applied.
To fill the pool, follow the tile adhesive manufacturer’s instructions. (7 to 14 days).
